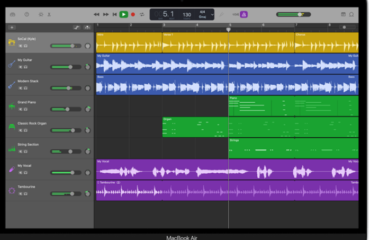
In Ableton Live, looping can be done using either the Session View or the Arrangement View. In the Session View, audio files are loaded into Clip Slots on tracks. The Loop Start and End Points can be set in the Arrangement View to specify a particular section, and the loop can be activated using the loop switch for a set number of bars.
If someone is having trouble looping in Ableton Live, the following article provides step-by-step instructions and more helpful information.
- To loop a section or sample in Ableton’s Arrangement View, the user needs to set the Loop Start and End Points. These markers can be adjusted to determine the duration of the loop;
- Once the loop points are set, the user should select the Loop Switch from the top menu bar and press the play button. This will cause the channels within the loop markers to loop continuously;
- If the user wants to hear only a specific channel, they can solo that channel or mute the channels they don’t want to hear.
Loop in the Session View
To loop in the Session View, the user should follow these steps:
- Step 1: Open the Session View by clicking the button with three vertical lines in the top right-hand corner. This will allow access to Clip Slots where samples can be added;
- Step 2: Create an audio track by right-clicking the Mixer Drop Area in the center of the Arrangement View and selecting “Insert Audio Track” from the drop-down menu. It is recommended to create four audio tracks for demonstration purposes, but more can be created if desired;
- Step 3: Load samples into Clip Slots for looping. Samples can be added to Clip Slots by either dragging and dropping the files or accessing them from the Browser Sidebar on the left side of the window.
These samples can be loaded into each Clip Slot on every track. While clips can be added to both audio and MIDI tracks, adding samples to a MIDI track serves a different purpose. Audio track clips are solely audio files that are looped to create an arrangement.
- To audition a sample, simply click on it once. Once a desired sample is found, it can be dragged to an audio track and placed in the desired Clip Slot. The clip can be triggered using the play button next to the Clip Slot;
- In Ableton Clip View, multiple samples can be added to slots. These samples will be automatically warped to match the grid and looped. The Warp and Loop options should be selected in the Clip View for each clip. The Clip View can be accessed by double-clicking the clip, and it will appear below;
- The loop length can also be edited in the Clip View by adjusting the markers on the left and right of the waveform. This allows for the creation of original and cohesive compositions using the chosen clips.
In the Session View, clips can be added, combined, and adjusted in terms of length and playback. This provides flexibility in structuring a song according to personal preferences, resulting in unique compositions derived from the source material.
Different keys
In Ableton Live, when encountering samples in different keys, it is possible to adjust their pitch to match the desired key. This can be done by transposing the clip, which involves modifying the Transpose option in the clip view. By adjusting the transpose value, the pitch of the clip will change accordingly, measured in semitones.
To halt the playback of each clip, one can click on the square located below the Clip Slots and just above the channel input (1). For stopping all clips simultaneously, there is a box at the bottom right of the columns below the Clip Slots (2), positioned just above the Master Channel’s input.
Regarding clip organization, in Ableton Live, clips on different tracks are set up to play simultaneously. However, on the same track, only one clip can be played at a time. By triggering a scene, which consists of a row of clips, all the clips within that row and loaded into the Clip Slots will be activated. The order of the clips can be arranged as desired within these parameters to create the desired structure and arrangement.
To wrap up
- Ableton Looper can be utilized to record loops from the audio of a specific track by activating the record button. It can be added as an Audio Effect in any track from the Audio Effects category in the Browser Sidebar;
- Looping an external instrument in Ableton Live involves enabling the record button on the designated track and selecting the circle icon to the left of a Clip Slot to begin recording. The recording can be ended by pressing the Clip Stop Button, resulting in the creation of a loop in that Clip Slot;
- Creating a MIDI loop in Ableton entails adding an instrument to a MIDI channel, enabling the record button, and pressing the circle record button beside a Clip Slot. The performance can be recorded by triggering the instrument with a MIDI controller, and the recording can be concluded by selecting the clip’s play button or the Clip Stop Button. This action will generate a MIDI clip on the chosen Clip Slot;
- Fixed length recording is a feature that allows for recording a loop with a specified number of bars. It can be utilized with Ableton Push or the Looper audio effect, where the desired number of bars is set before activating the record button. The record length option is available in the drop-down menu of the Looper audio effect.
FAQ:
1. How do I make a loop in Ableton 10?
In Ableton Live 10, creating a loop is a straightforward process. Here’s how you can do it:
- Set the Loop Start and End Points: In the Arrangement View, navigate to the desired section of your track where you want the loop to start and end. Click and drag the Loop Start marker (1) to the beginning of the loop and the Loop End marker (2) to the end of the loop;
- Activate the Loop: Ensure that the loop is activated by clicking on the Loop Switch (3) located in the top menu bar. It will turn blue when enabled;
- Start Playback: Hit the play button to begin playback, and the selected section will loop continuously until you stop it.
Remember, the Loop Start and End Points can be adjusted at any time by dragging the markers to different positions. Additionally, you can also loop in the Session View by launching clips within the desired loop range.
2. What is the hotkey for loop brace in Ableton?
In Ableton Live, there is a convenient hotkey to enable the loop brace, allowing you to quickly define the loop range. The hotkey for the loop brace is the “[” (left bracket) key on your keyboard. Pressing this key will activate the loop brace, and you can then set the Loop Start and End Points by adjusting the markers.
To adjust the position of the loop brace, you can use the arrow keys to move it left or right in small increments. Holding the Shift key while pressing the arrow keys will move the loop brace in larger steps.
Using the hotkey for the loop brace provides a faster workflow, especially when you need to set up loops quickly during live performances or while working on music production.
3. How do I extend a loop in Ableton?
To extend a loop in Ableton, follow these steps:
- Adjust the Loop End Point: If you want to extend the loop to a later section in your track, first move the Loop End marker (2) to the new desired position by clicking and dragging it;
- Playback and Capture: Start playback by pressing the play button, and when the loop reaches the original Loop End Point, continue playing the track past that point. Ableton will automatically capture the new section as part of the loop;
- Loop Extension: Once the desired section is captured, stop playback. The loop will now be extended to include the newly added portion.
By extending the loop, you can incorporate additional elements into your composition or create variations in your music arrangement. It provides flexibility and allows you to explore different musical ideas within the looped section of your track. Remember, you can always adjust the Loop Start and End Points further to refine the loop as needed.