Recording vocals is a crucial aspect of music production. Whether you’re a seasoned musician or just starting out, knowing how to record vocals in FL Studio can greatly enhance the quality of your tracks.
Setting Up Your Recording Environment
Before diving into the recording process, it’s important to ensure that your recording environment is optimized for capturing pristine vocals. Here are some key considerations:
Creating a Soundproof Space
To minimize unwanted background noise and reverberations, set up your recording space in a room with good sound insulation. You can also use soundproofing materials, such as acoustic panels or foam, to further improve the recording environment.
Positioning the Microphone
Proper microphone placement is crucial for capturing clear and balanced vocals. Follow these guidelines for optimal results:
- Use a microphone stand to ensure stability and reduce handling noise;
- Position the microphone at a comfortable height, aligned with your mouth;
- Experiment with different distances from the microphone to find the sweet spot for your voice.
Selecting the Right Microphone
Choosing the right microphone is essential for capturing the nuances and character of your voice. Here are some common types of microphones used in vocal recording:
Condenser Microphones
Condenser microphones are popular for recording vocals due to their sensitivity and ability to capture a wide frequency range. They offer excellent detail and clarity, making them suitable for various vocal styles.
Dynamic Microphones
Dynamic microphones are known for their durability and ability to handle high sound pressure levels. They are often preferred for live performances but can also be used for vocal recording, especially for genres that require a more robust sound.
Ribbon Microphones
Ribbon microphones are renowned for their smooth and vintage character. They excel at capturing warm and intimate vocals, making them a favorite choice for certain genres and recording styles.
Consider your budget, vocal style, and recording environment when selecting the right microphone for your needs.

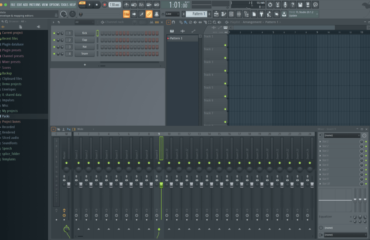
Preparing FL Studio for Vocal Recording
Before you start recording, make sure FL Studio is properly configured to capture vocals. Follow these steps:
1. Selecting the Correct Audio Interface
Ensure that your audio interface is correctly connected to your computer and recognized by FL Studio. Choose your audio interface as the primary input device in the software’s audio settings.
2. Setting Up Recording Channels
Create a new audio track in FL Studio to record your vocals. Assign the correct input source (corresponding to your microphone) to the track and set the input level accordingly.
3. Applying Essential Effects and Processing
To enhance the vocal recording, consider applying effects such as EQ (equalization) to adjust the tonal balance, compression to control dynamics, and reverb to add a sense of space. Experiment with these effects to achieve the desired sound.
Recording Techniques and Tips
Now that your setup is ready, let’s explore some essential recording techniques and tips to help you capture high-quality vocal performances:
Warm-Up and Vocal Preparation
Before hitting the record button, it’s crucial to warm up your voice and ensure vocal readiness. Perform vocal exercises, drink warm water, and avoid excessive strain on your vocal cords.
Mic Technique and Performance
Maintain a consistent distance from the microphone throughout the recording to ensure consistent volume levels. Experiment with microphone angles and positions to find the sweet spot that complements your voice.
Multiple Takes and Punch-In Recording
Don’t be afraid to record multiple takes of a vocal part. This allows you to select the best performance and comp together different sections if needed. Utilize punch-in recording for fixing small errors or re-recording specific phrases without redoing the entire take.

Mixing and Post-Processing
Once your vocal recordings are complete, it’s time to mix them into your project. Here are some important considerations during the mixing and post-processing stages:
- Balancing Levels and EQ
Ensure that the vocal tracks sit well within the overall mix by adjusting their volume levels. Use EQ to sculpt the vocal frequency response, removing any unwanted resonances or enhancing specific characteristics.
- Adding Compression and Effects
Apply dynamic compression to control the vocal levels and create a consistent sound. Experiment with additional effects such as chorus, delay, or modulation to add depth and character to the vocals.
- Creating Stereo Width
Use stereo imaging techniques to widen the vocal sound, making it more spacious and immersive. Be cautious not to overdo this effect, as it can lead to an unnatural or phase-related imbalance.
- Automation and Vocal Automation
Utilize automation to add movement and dynamics to the vocals. Automate parameters like volume, panning, and effect settings to create compelling vocal arrangements that enhance the overall song structure.
Conclusion
Recording vocals in FL Studio requires careful attention to detail, from setting up the recording environment to fine-tuning the mix. By following the steps outlined in this guide, you’ll be well-equipped to capture professional-quality vocal recordings. Remember to experiment, trust your ears, and most importantly, enjoy the process of bringing your vocals to life in FL Studio.