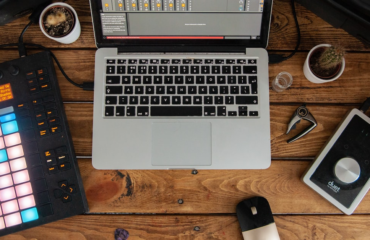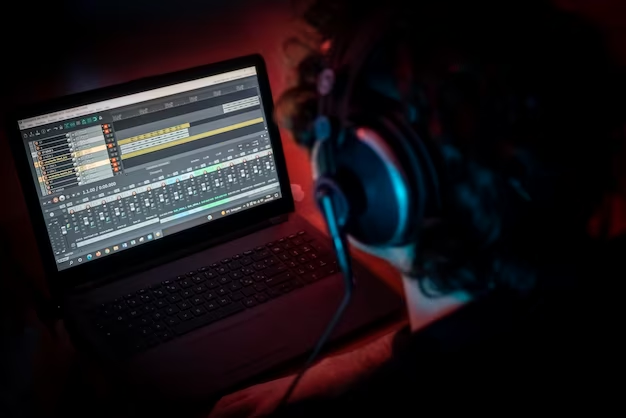
Flourishing as a powerful music production platform, FL Studio supports intricate sound engineering, making it a favorite among global artists. This article serves as a detailed guide, assisting you in choosing, installing, and using a drum kit in FL Studio. A drum kit, pivotal to your music production, typically comprises a set of WAV files that cater to a multitude of musical styles.
Unzipping the chosen kit, integrating it into FL Studio, and adding the drum sounds to your projects are the key steps this guide will walk you through. It further enlightens you on customizing your drum kit, lending a unique touch to your tracks. Let’s delve into this comprehensive guide to elevate your music production skills within FL Studio.
Step 1: Choosing Your Drum Kit
A drum kit typically comes in a compressed format, such as ZIP or RAR, and comprises a collection of WAV files. These files represent different drum sounds – from snares and kicks to hi-hats and cymbals.
Drum kits are available in a multitude of styles and genres, including hip-hop, EDM, rock, and more. Some reliable sources to procure drum kits include:
Remember to choose a kit that best aligns with the music you aim to create. Upon downloading, ensure the kit is saved in a folder you can quickly locate.
Step 2: Unzipping Your Drum Kit
To extract the compressed files of your drum kit, follow these steps:
Obtain a decompression tool such as WinRAR or 7-Zip. These tools will allow you to extract the files from the compressed folder.
- Right-click on the compressed file. A context menu will appear;
- From the context menu, choose either ‘Extract Here’ or ‘Extract Files.’ Selecting ‘Extract Here’ will decompress the files in the same location as the compressed folder. Choosing ‘Extract Files’ will prompt you to specify a destination for the extracted files;
- If you choose ‘Extract Files,’ select your desired location by browsing through your directories. Once you’ve chosen the location, click ‘OK’ to begin the extraction process;
- The decompression tool will extract the files from the compressed folder and create a new folder in the specified location. The new folder will retain the same folder structure as it was initially organized in the compressed file.
By following these steps, you can successfully unzip your drum kit and access the individual files it contains.
Step 3: Importing the Drum Kit into FL Studio
Now comes the fun part – importing your newly acquired drum kit into FL Studio. The steps are as follows:
- Open FL Studio. If it’s already running, save your work and restart the software;
- In the FL Studio main interface, locate the ‘Browser’ panel on the left-hand side. The Browser is your navigation tool for project files, samples, and plugins;
- Now, navigate to the top menu and select ‘Options’. Within this dropdown, choose ‘File Settings.’
- In the ‘File Settings’ window, you will see a section labeled ‘Browse extra search folders.’ This area is where you can add new paths for FL Studio to scan;
- Click on the ‘Folder’ icon on the right of an empty box. This action opens a new window for you to navigate your file directory;
- Find and select the folder where you extracted your drum kit. Click ‘OK.’
- FL Studio will now scan the new folder path and add it to the Browser.
If you do not immediately see your drum kit, hit F5 while focusing on the Browser to refresh the directory.
Step 4: Using the Drum Kit in Your Project
With your drum kit installed, it’s time to incorporate it into your projects. The procedure involves creating new channels in the Channel Rack and assigning them drum sounds from your kit.
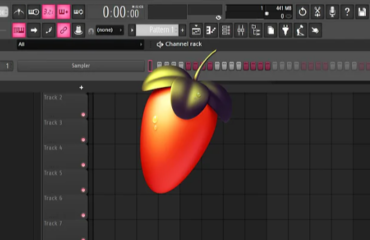
- Open the Channel Rack by clicking the icon at the top of the FL Studio interface (looks like a set of squares);
- To add a new channel, click the ‘+’ icon at the bottom of the Channel Rack. From the list of options, choose ‘Sampler.’ This selection creates a new sampler channel;
- Now, click on the rectangle at the top of the new channel to open the Sampler’s properties;
- In the top-right corner of the Sampler’s properties, click the folder icon. This action opens abrowser window, allowing you to navigate your drum kit files;
- Select the drum sound you want to use and click ‘Open.’ This action loads the drum sound into the sampler channel.
Repeat these steps for every drum sound you wish to incorporate into your project.
How to Customize Your Drum Kit in FL Studio

Once you have loaded your desired drum sounds, you can customize and fine-tune each sound to create a unique drum kit for your project.
1. Volume and Panning
In the Channel Rack, you’ll see two knobs beside each channel: one for volume and another for panning.
- Volume: Adjust this to make the drum sound louder or softer;
- Panning: Use this to control the stereo placement of the sound. Turning the knob left makes the sound play more in the left speaker, and turning it right makes it play more in the right speaker.
2. Channel Settings
The Channel Settings window contains a range of options to modify the drum sound further.
- Pitch: Adjust the pitch knob to make the drum sound higher or lower;
- Time Stretching: Use this feature to make the drum sound shorter or longer without changing its pitch. Choose one of the stretch modes from the drop-down list (e.g., Resample, Stretch, etc.), then adjust the time knob to the left to make it shorter or right to make it longer;
- Reverse: This option plays the drum sound backward;
- Envelope: You can shape the volume envelope of the drum sound using the ADSR (Attack, Decay, Sustain, Release) controls. For instance, you can make the sound fade in slowly by increasing the attack, or you can make the sound stop abruptly after triggering by reducing the release.
3. FX Mixer
You can add effects to your drum sounds using the Mixer.
- In the Channel Rack, select the drum sound you want to add effects to;
- At the bottom of the Channel Rack, you’ll see a box labeled ‘Track.’ Click this box and select an empty Mixer track (any track without a green light);
- Go to the Mixer by clicking the Mixer icon at the top of the FL Studio interface (looks like a mixing console). In the Mixer, click on one of the ‘Slot’ boxes on the right and choose an effect from the drop-down list.
4. Saving Your Drum Kit
After customizing your drum kit, you might want to save it for future use.
- To save your drum kit, go to the Channel Rack, click the arrow in the upper-left corner, and select ‘Save as.’ Then choose ‘Save mixer track state as…’
- In the pop-up window, type the name for your drum kit and click ‘Save.’
FL Studio will save your drum kit, complete with your customizations, to the ‘Preset’ folder in the Browser.
To better comprehend the process, here’s a video tutorial for a more visual step-by-step guide:
How to Add Drum Kits to FL Studio 20
How to add Drum Kits into FL Studio 20
FL Studio 20: Sample Packs and Drum Kits installation – How to add Sound Packs
Conclusion
This detailed guide has provided step-by-step instructions for installing and using a drum kit in FL Studio. By choosing a suitable drum kit, unzipping the files, importing them into FL Studio, and creating new channels in the Channel Rack, you can incorporate the drum sounds into your projects. Additionally, the guide offers tips on customizing the drum kit by adjusting volume, panning, pitch, time stretching, and applying effects using the Mixer. It also explains how to save your customized drum kit for future use. Finally, the FAQ section addresses common concerns such as missing drum kits in the Browser and using multiple drum kits in one project, providing further assistance to users.
FAQ
If your drum kit isn’t showing up, try refreshing the Browser. Navigate to the ‘Options’ menu, click ‘Browser smart find,’ and hit ‘Refresh.’
Yes, you can. Just follow the same steps to add as many drum kits as you want, and use the sounds from these kits in your project.
Navigate to ‘File Settings,’ locate the path of the deleted drum kit under ‘Browse extra search folders,’ and click on the’X’ button on the right. Then, refresh the Browser again.
FL Studio supports several audio file formats, but WAV is the most common format for drum sounds.